Baking pi-fect homecomputers: Raspberry Pi
Somewhere in February 2012, The Raspberry Pi Foundation successfully launched Raspberry Pi with the intention of teaching students a great deal about computer science. Across the world, many children, young adults and adults still look for alternative and low-cost options to buying personal computers, and Raspberry Pi, which costs $35 and is an index card sized single board computer, meets great expectations.
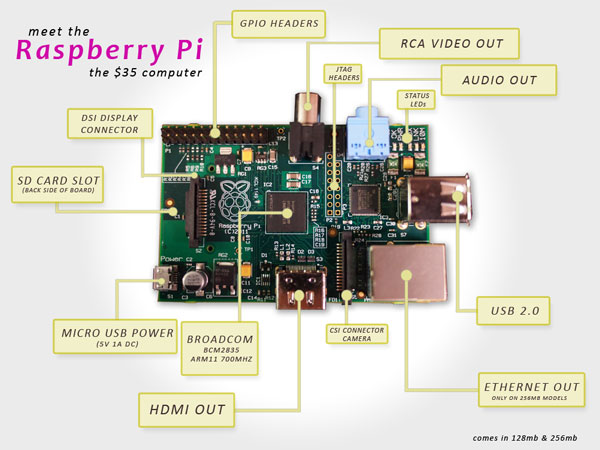
Raspberry Pi is not your everyday PC or media player but it is more like a tinker toy which will teach you how to tame some code and enjoy the art of computing in the process. Even though it does not have a multiboard computer’s prowess, it is still a computer! It is a complete computer built on a single circuit board with microprocessors, memory and input/output (I/O), and it is often used for demonstrative/educational systems or as embedded computer controllers; it is a more powerful option compared to an Arduino for your Do It Yourself (DIY) goals and perfectly kickstarts your gaming ambitions (yes, you can build your own game smoothly on this device).Once you buy your Raspberry Pi, you will need a few more things to supplement its baking.
What you need to get started:
- Power supply
Use a 5V micro USB power supply to power your Raspberry Pi.
- SD Card
- Keyboard and mouse
Any standard USB keyboard and mouse will work with your Raspberry Pi
- Display and connectivity cables
Any HDMI/DVI monitor or TV should work as a display for the Pi. Use a standard Ethernet cable for internet access.
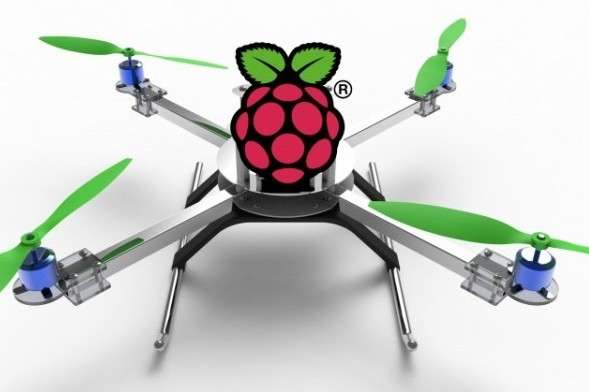
 Source-xenstreet.com
Before you plug anything into your Raspberry Pi, make sure that you have all the equipment listed above. Then follow these instructions:
- Begin by slotting your SD card into the SD card slot.
- Next, plug in your USB keyboard and Mouse into the USB slots
- Ensure that you have your monitor or TV switched on, and that you have selected the right input (e.g. HDMI)
- Connect your HDMI cable from your Raspberry Pi to your display device
- If you intend to connect to the internet, plug in an Ethernet cable into the Ethernet port next to the USB ports
- Finally, plug in the micro USB power supply. This action will turn on and boot your Raspberry Pi
- If this is the first time your Raspberry Pi and a NOOBS SD card have been used, then you will have to select an operating system and configure it. Follow the NOOBS guide to do this.
Fun things to do once you have setup your Raspberry Pi:
- Build a substitute Mario Machine- You can use your Raspberry Pi to write your own game and/or build and power arcade games such as Mario!
- Build a LEGO case
- Once your Raspberry Pi is live and ticking, ensure it is dust-free and protected from the heat! To make your device more attractive, you can build a case made with LEGO
- Build a Braille teacher- You can use your Raspberry Pi for a noble cause and ensure that nobody is left behind in the race to ace code. Go ahead and build something like the Mudras!
- Learn Python: You can learn Python, tap your computing skills and go on to achieve milestones in computer science
- Use and build your own Otto: Ever fancied clicking a Harry Potteresque photo- a photo with people moving in and out of the frame? Looks like Otto is what you’re looking for! Otto is a hackable camera powered with a Raspberry Pi. There is nothing stopping you from building your own camera and getting what you want—so go ahead and build your own Raspberry Pi powered camera!
Note that Raspberry Pi is gaining wide popularity across India and can be purchased conventionally or bought online on Ebay, Snapdeal and Amazon India at competitive rates. Now that we have seen how to get started with Raspberry Pi and seen all the cool things we can do with it, it is time to go ahead bake your Pi and sink your teeth into it too!
-Shrutika Kalbag
More from Entertainment


Important Resources
- Education Franchisee opportunity
- NCERT Solution
- CBSE Class 9 Mathematics
- NCERT Solutions for class 10 Science
- Sample Papers
- CBSE Class 9 Science
- NCERT Solutions for class 10 Maths
- Revision Notes
- CBSE Class 10 Hindi
- CBSE Class 10 English
- CBSE Class 10 English
- CBSE Class 10 Social Studies
- CBSE Class 10 Science
- CBSE Class 10 Mathematics
- Career In Science After 10
- Career In Commerce After 10
- Career In Humanities/Arts After 10
- NCERT Solutions for Class 10
- NCERT Solutions for Class 11
- Business Studies Class 12 CBSE project